How to Preserve Leaves: 6 Interesting Ways
Leaves come in vibrant colors and the need for preserving them stems from their varied uses in daily life. We have enlisted here a few easy recipes to maintain the color and texture of some of your favorite leaves in the best way possible.
How to Preserve Leaves
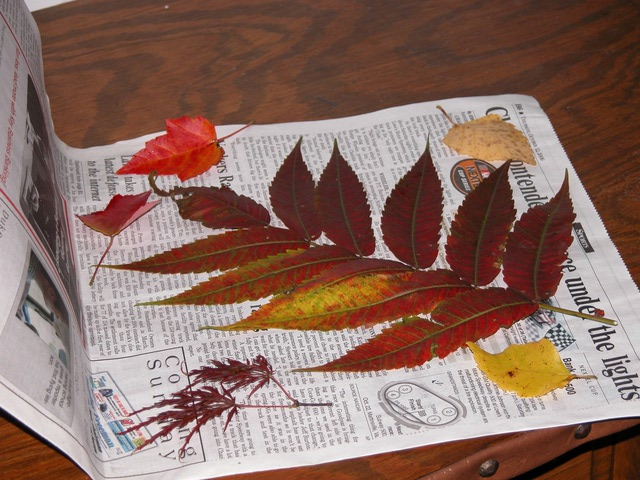
Preserving Fall Leaves with Glycerin
One of the greatest reasons of loving autumn is the beautiful fall leaves. If you want to keep them intact even after the season is gone try this method.

How to Preserve Fall Leaves
Supplies
- Fresh fall leaves
- Glycerin
- Water
- Flat pan
- Any weight to keep the leaves submerged in liquid
Steps
- Make about 1 cup of mixture with one part glycerin and two parts water.
- Pour the solution into the flat pan. Put the leaves in it.
- Put the weight on the leaves so that they remain immersed in the liquid and don’t come up to the surface.
[N.B. If you do not want to put the weight directly on the leaves, take a large enough Styrofoam plate and put it in the solution so as to cover the leaves. Now you can put the weights atop the plate.]
- Let the leaves sit in the solution for 2-6 days.
- Take them out and dry them gently by dabbing with a paper towel. You will find them to be very soft and pliable at this stage.
A bonus of this project is that the colors look more vibrant after finishing with the process. You can easily use the autumn oak or holly leaves for school crafts.
Maple leaves can also be preserved by putting them in between paper towels and microwaving for 2 min. If you see that the leaves are curling, then they are not dry enough, and you need to heat for 1-2 more minutes. Take them out and let them dry in air for 2 days. Additionally, you can spray with acrylic craft spray.
Tips for Preserving Magnolia Leaves
For preserved magnolia leaves, take off a small branch containing the leaves and chip off its end with a hammer to expose the vascular system and follow the above method. However, it takes around 6 weeks for the leaves to absorb the glycerin. In the end, they change their green color to chestnut but retain the glossy texture and suppleness.
How to Preserve Mint Leaves
Fans of mint leaves like to add them to just about any recipe for that fresh taste that lingers in the taste buds. If you are growing them in the garden, these steps could help preserving them for the delectable desserts, soups or mojitos later.
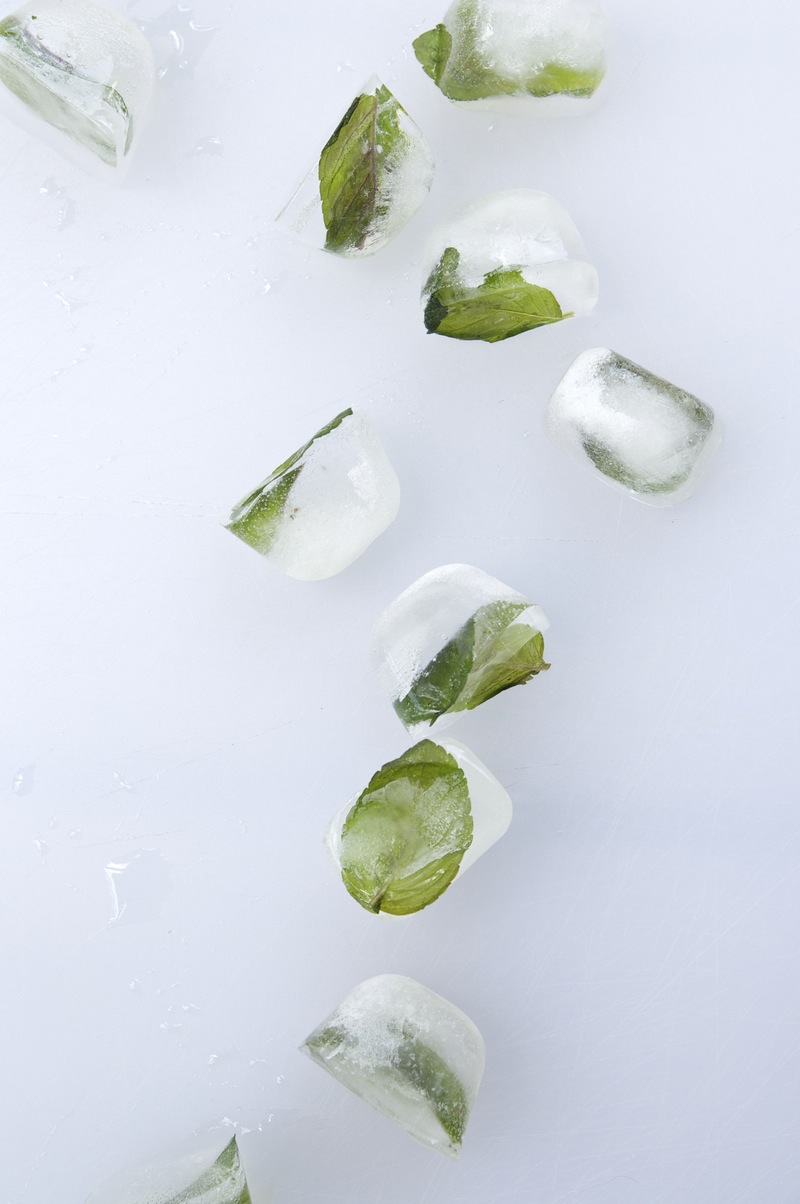
Preserved Mint Leaves
- Put one or two leaves in each compartment of an ice cube tray and fill the tray with water.
- Freeze it.
- When you need the leaves, just take the ice cubes containing the mint leaves out and put on a sieve until all the ice melts away and you are left with the leaves.
Guide to Preserve Basil Leaves Fresh
- Blanch fresh basil leaves in boiling water for 2 seconds.
- Move the leaves to an ice bath.
- Allow to dry completely.
- Put the leaves in layers separated by parchment or wax paper.
- Store in a freezer safe container.
You will find that the leaves to shrink as you freeze them. However, you can use frozen basil just like fresh basil.
Preserving Grape Leaves
Preserve the freshness of grape leaves to help you cook up a great recipe with the delicious aroma intact anytime you choose.
Supplies
- 2 tsp kosher salt mixed in 1 quart water
- 1 quart washed, young grape leaves picked in spring with their stems removed
- 1 cup fresh lemon juice
- 1 quart water
- 2 pint size canning jars
Steps
- Boil the salted water in a pan.
- Blanch the grape leaves in the solution for 30 seconds.
- Drain the water.
- Stack them into 2 neat piles and loosely roll them.
- Stand the rolls in the canning jars.
- Add the lemon juice to the second pint of water and boil.
- Fill the jars with the above solution until the level is ½ inch from the top.
- Seal the jars.
- Put in a boiling water bath for 15 minutes.
Preserved Palm Leaves Recipe
Palm fronds are used to give a country chic glow to the interior décor. They also serve decorative purposes for outdoor gatherings and celebrations. Preserve a collection of them to assemble into a vivacious palm tree!
- Lay a palm frond on a sheet of wax paper and cover with another one.
- Evenly distribute heavy books on top.
- Place packets of silica gel around the pressed frond.
- Let it sit for a couple of weeks.
- Remove the books and peel the wax paper off.
- Take the frond to an airy and well-ventilated space and place it on newspaper.
- Wear a face mask and spray it with acrylic spray on one side.
- After half an hour, flip it over and spray on the other side. Wait for half an hour.
- Repeat the spraying process as described above but this time with matte finish to clear away the glossy finish of the acrylic.
Let the oranges, yellows and greens last for long in your corridor, living space and craft projects with just a little care and effort long after the nourishing seasons are gone and the leaves are separated from the lap of nature. Remember us every time you take a sip of your beloved mint tea.