How to Make Air Dry Clay
We have tried to consolidate a few easy air dry clay tutorials so that you can unleash the sculptor in you in the best DIY way possible.
How to Make Air Dry Clay
Air Dry Clay Recipe with Cornstarch and Baking Soda
Those who hate the sticky feeling of glue in their hands can vouch for this recipe as it does not use any glue. This method teaches you the air drying procedure from scratch.
Supplies
- Cornstarch (cornflour) – 1 cup
- Baking soda – 2 cups
- Cold water – 1.5 cups
- Liquid or gel food coloring of your choice

Air Dry Clay Recipe
Steps
- Whisk the baking soda and cornstarch together in a pot to mix them thoroughly.
- Now stir the water in avoiding lumps and making a smooth mix.
- Add a few drops of food color. It will give the dough a pastel color. If you want a deeper shade, keep on adding color until you get the desired shade.
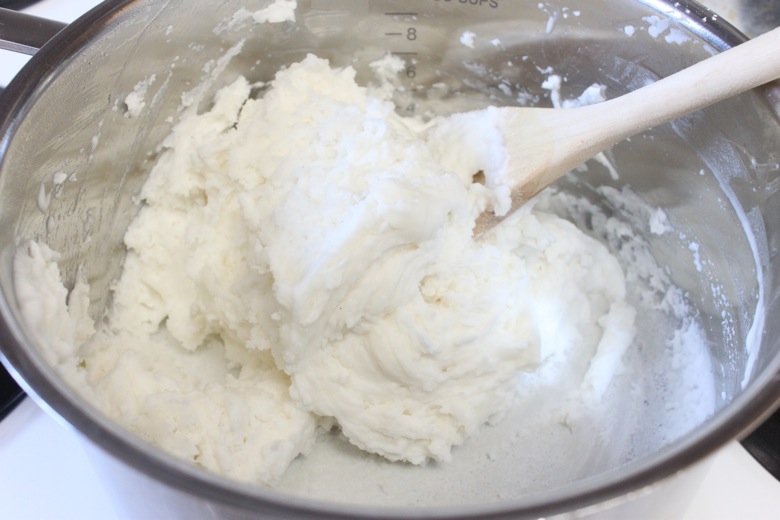
- Medium heat pot while stirring constantly to prevent any dough from sticking to the bottom.
- Whisk nicely until the mix thickens after a little bubbling. It turns into a ball after about 5 minutes.
- When it becomes difficult to move the whisk, remove from heat.
- Allow to cool. Keep it moist by covering the pot with a wet dish cloth to aid cooling.
- Smoothen dough by kneading. If it seems sticky, thicken by adding more cornstarch. However, if it seems too thick, knead adding 1 tsp of water.
- Now your clay is ready for modeling. Make structures you desire and leave them out on a tray to dry.
It may take 1 -2 days for complete drying post which you can decorate at will with acrylic paint.
Homemade Air Dry Clay Using Flour and Glue
Kids can get messy with this project as this involves no cooking on heat or baking. The glue gives adds strength to the clay.
Supplies
- Elmer’s glue – ¼ cup
- Flour – ¼ cup
- Cornstarch – ¼ cup
Steps
- Mix the ingredients together nicely in a small bowl.
- Knead the mixture thoroughly until it transforms into moldable clay that is just slightly sticky in texture. Otherwise, it could become brittle or crack on drying.
- Create shapes of your choice and store them in an air-tight container until they become dry and hard. It usually takes 24-48 hours.
You may paint the forms beautifully and decorate with ribbons and beads. If you want, you can replace the flour with baby powder.
Air Drying Clay with Bread
Steps
- Cut off the crust from 7 slices of bread.
- Break off the bread into tiny pieces and transfer them to a medium-size
- Add 7 tsp white glue and mix nicely.
- Repeat the mixing process after adding ½ tsp water and ½ tsp dishwashing
- Knead until you get the perfect consistency of clay.
Now you can mold and leave for air drying. Note that the method uses no cornstarch, flour or baking soda.
How to Make Air Dry Porcelain Clay for Modeling
Cold porcelain is sort of cheap air dry clay that can replace regular polymer clay.
Supplies
- Cornstarch – 1 cup
- Vinegar/lime/lemon juice – 2 tbsp
- PVA glue – 1 cup
- Baby oil – 2 tbsp
Steps
- Mix the cornstarch and glue together in a microwave-safe container.
- Add the lemon juice and mix again. Now combine the baby oil.
- Microwave it in 5 time-slots, each of duration 15 seconds.
- At the end of each slot, take out the container and mix nicely with a fork or knife.
[N.B. After the 3rd slot, you will find clumps forming. Ensure to mix them well.]
- Knead until cooled on a clean surface. Usually, it takes 10-15 minutes.
- Wrap it tightly in a plastic film, put in an air-tight container to make it dry faster and refrigerate for 24 hours.
- If the inside is still sticky after taking it out, add some more cornstarch and knead some more.
You know that it is of the right consistency when you pull out a little part of it, and it forms a tear drop shape.
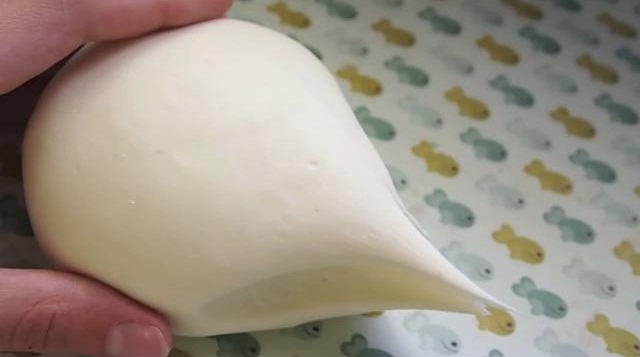
Air Dry Porcelain Clay
Now you can start to work on different sculpting ideas with your own air dried clay made at home. Let your imagination run wild to create exotic Christmas decorations, jewelry and other art and craft items that are durable.