DIY Marshmallow Pops to Satiate Your Sweet Tooth
Up the fun factor of a children’s party by getting them involved in this no-bake, no-flame recipe that yields savory results. You can also make the marshmallow pops as a part of a gift basket or goodie bag. They can be whipped up really fast and look beautiful apart from tasting great. So, a party spread can be made to look colorful and swoon-worthy with these thrown in.

Marshmallow Pops Recipe
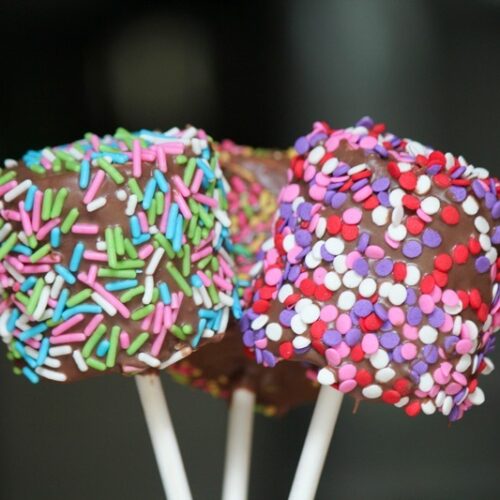
The simple recipe involves spearing big marshmallows, dunking them in chocolate and dusting them with sprinkles. You are free to experiment with the decoration part. That the marshmallow pops are not labeled dessert, but snack, allows kids to enjoy them anytime after they wake up in the morning and not exclusively after a heavy meal!
Ingredients
- 20 large marshmallows
- 20 lollipop sticks
- 1 oz bag of chocolate candy melts (white, dark or milk chocolate)
- Sprinkles or other decorative toppings of choice
Instructions
- Place the chocolate melts in a micro-proof bowl
- Heat it in a microwave on 50% power for a minute.
- Stir well
- Continue heating in 30-second intervals, stirring between each, until the chocolate is completely melted. [N.B. You should not overheat, or the chocolate may burn and cannot be worked with]
- As the microwave is at work, insert the lollipop sticks into the center of the marshmallows through their flat sides. Stick them in firmly without piercing the other side.
- Place the sprinkles and other toppings in a small bowl
- Line a sheet pan with waxed paper and set it aside
- Dip the tops of the marshmallows into the melted chocolate and let the excesses drip down into the bowl
- Wait for 10 seconds and then sprinkle the toppings onto the marshmallows with your hand or a spoon
- Place them on the prepared sheet pan, stick sides up
- Let the pops sit for around 30 minutes until the chocolate is all set.
Other Fun Decoration Ideas
- For a little girl’s birthday party, you can dip the chocolate-covered marshmallow pops in a cup of pink frosting before adding the sprinkles. It will look super cute!

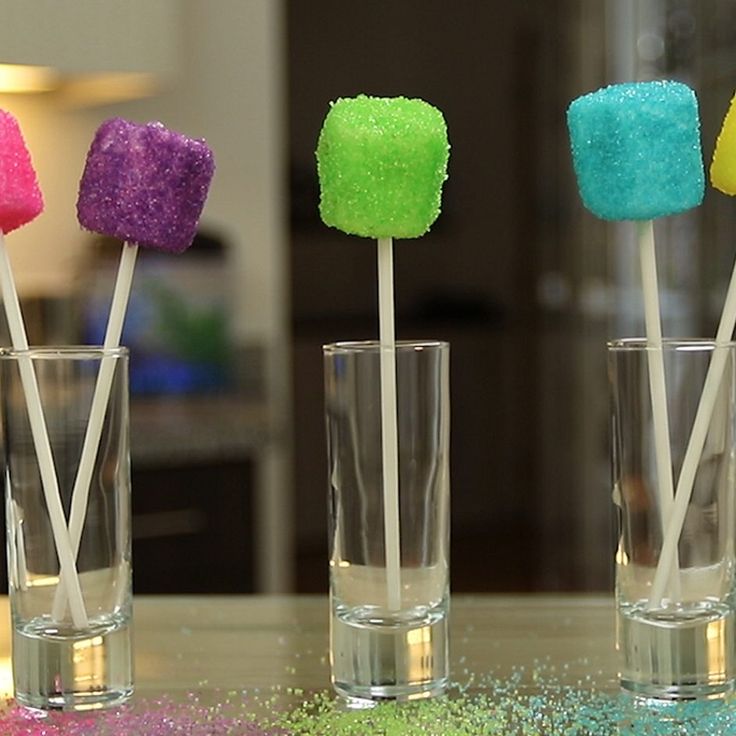
- Instead of coating with sprinkles, you can give the marshmallows a sprinkling of colored sugar for a pretty unconventional, glittery look.
- Other decorative toppings that can be used in the recipe are graham cracker crumbs, crushed Oreos, chopped candy corn, crushed vanilla wafers and mini milk chocolate chips.
How to Store Marshmallow Pops
For storing them, you first need to line an airtight container with butter paper. Layer the pops in uniform layers inside, with butter paper between each layer. Then close the lid of the container tightly and keep it in a cool area of your home. When stored thus, the marshmallow pops can last for up to 4 days.